How To Set Up The AI Ambassador App
For organizations looking to deliver messages in a more human, engaging way, AI Ambassadors offer a simple and scalable solution.
With our AI Ambassador app, you can create lifelike, on-screen presenters that speak your message naturally—making it easy to welcome visitors, share announcements, or highlight key information directly through your digital signage CMS.
What You'll Need:
- A compatible digital signage player e.g. Mvix, BrightSign, etc.
- An Active Signature Plan
- Internet Connectivity
Getting Started
Setting Up Your Ambassador
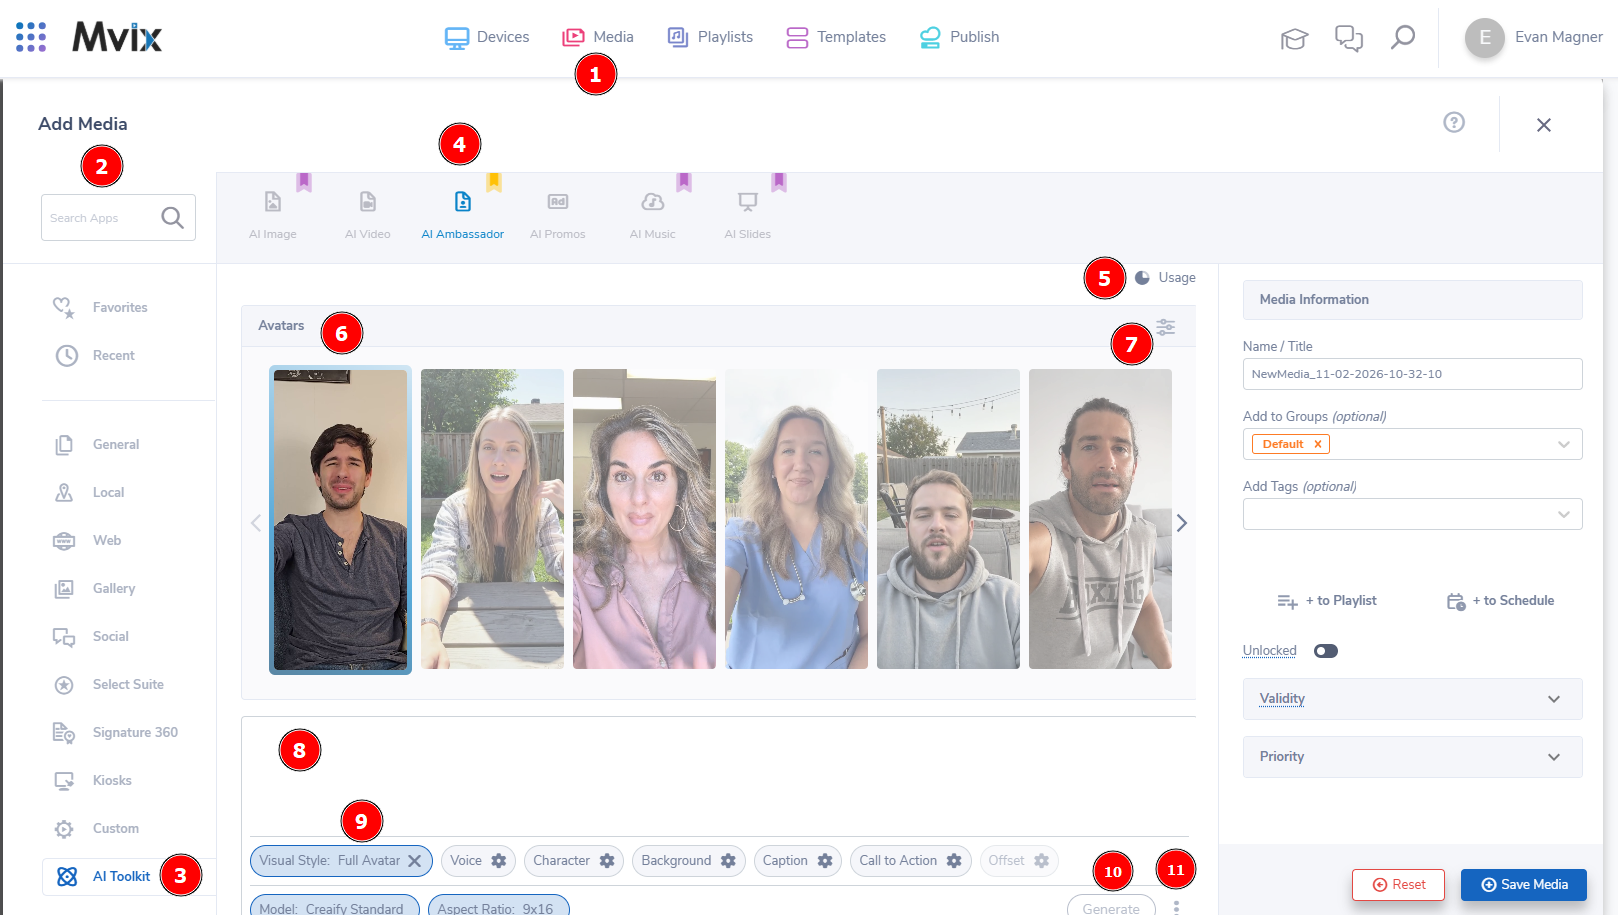
- From the CMS Dashboard, (1) hover over "Media" in the navigation bar at the top and select "Add Media".
- When the module opens, you can either search for the app in the (2) top-left or (3) click on "AI Toolkit" then (4) select "AI Ambassador".
- When the app loads, you'll see the above screen show up. First, we recommend you confirm your AI Credit Limit by (5) clicking "Usage" at the top-right. You will not be able to create new media if your limit has been reached.
- You'll need to (6) choose the avatar that best fits your message & branding. We offer (7) a filter that can help narrow down your available choices. You can also hover your mouse over the avatar to get a preview of how they look in motion.
- Next is the message. (8) Replace the sample text with the messaging of your choice.
- Now you can begin (9) further customization. We offer the following:
- Visual Style: How the Avatar card is presented.
- Voice: Choose the gender & accents then select the voice that best fits your avatar. You can also adjust the volume if needed.
- Character: Hide your avatar or change the presentation to a circle portrait.
- Background: Add a background image then adjust the fit or effect. Please note: You will need to choose or add a background to your avatar for it to generate.
- Caption: Either hide the caption or adjust the typography to fit your branding
- Call to Action: Add your Logo/Text and customize the typography for your call to action on the avatar card.
- Offset: Adjust the X/Y offset and scale for your avatar and/or caption.
- Model: Change the AI Model used to create your avatar.
- Aspect Ratio: Adjust the Ratio of the avatar card that you are creating.
- If you are satisfied with your setup, (10) click on "Generate" to create your AI Avatar. This could up to a few minutes.
- If you would like to view older creations, (11) click on the three dots on the right to see previous ones.
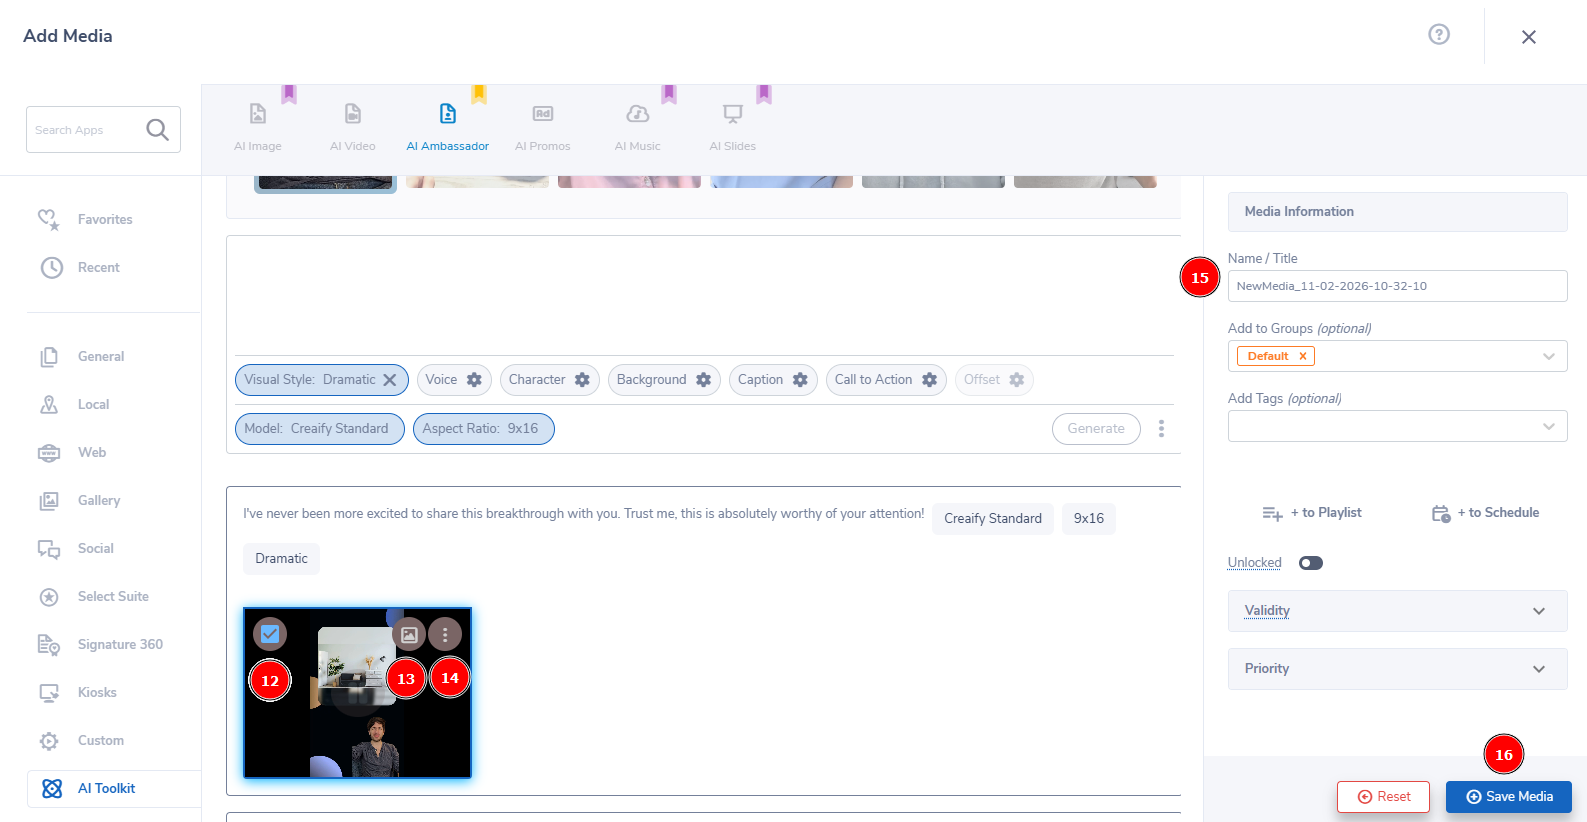
- Once the video is prepared, it will appear at the bottom of the module. Scroll down and you'll see the video card.
- It will automatically play a muted video. Hover over the video and you will see three icons at the top:
- (12) Checkbox: If you are satisfied with the video, make sure this is toggled on.
- (13) Preview: Pulls up a video so you can confirm the audio/video segment match what you're looking for.
- (14) Three Dots: You can download the video from here.
- If everything is good, make sure the video checkbox is selected, (15) Name/Title your media something easy to reference, and click (16) "Save Media" to save this to your CMS Media Library.