
How To Create & Assign Device Locations
For larger organizations with digital signage devices across multiple locations, grouping devices can be a necessity for both scheduling content, as well as easily viewing devices in a specific area of the office.
With our "Location View" viewport in the device library, you can segment your devices into multiple offices, locations, or use cases.
Getting Started
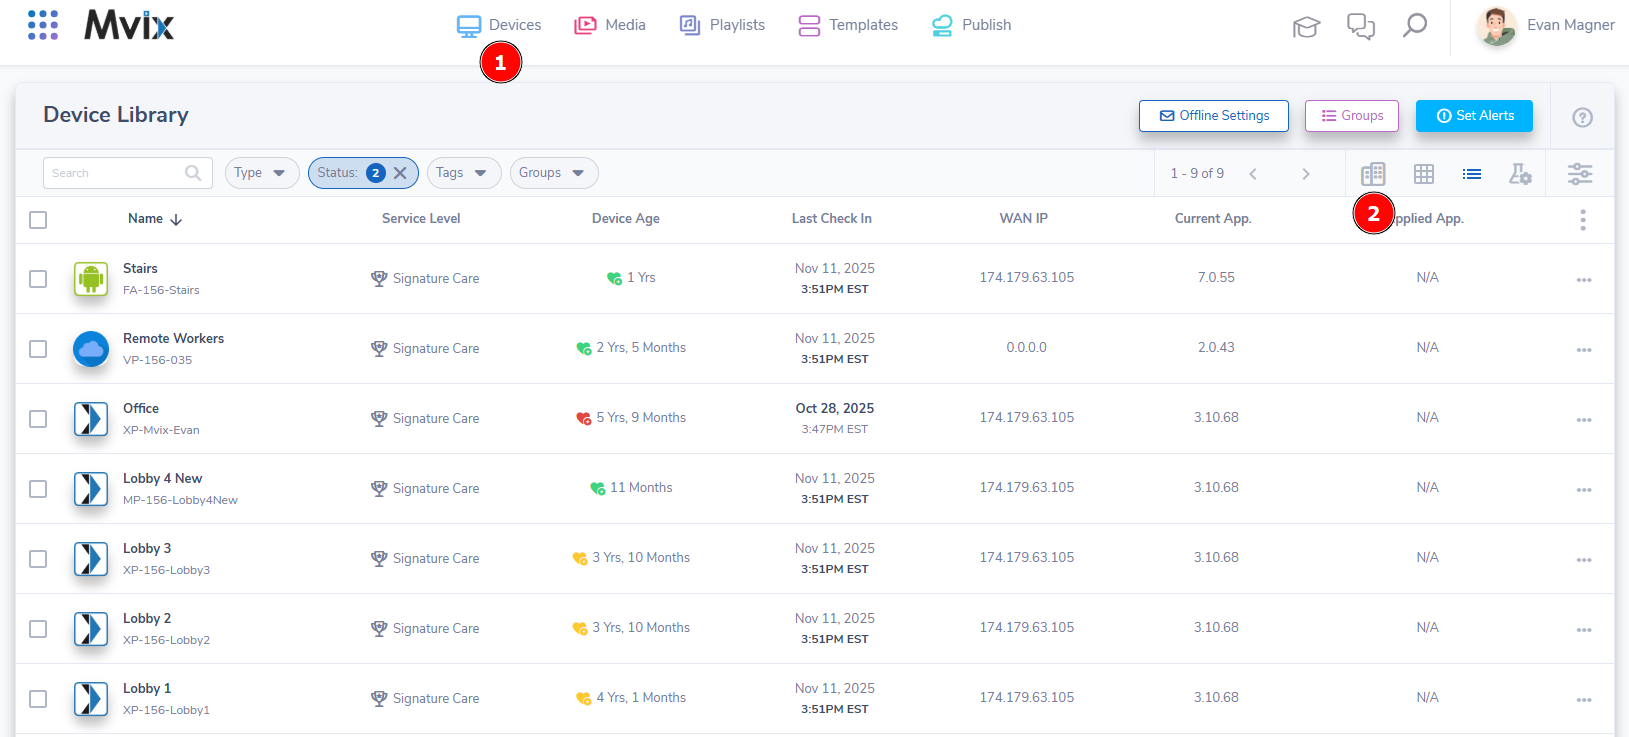
- First, you'll need to access the Device Library by (1) hovering over "Devices" in the navigation bar and clicking "Device Library"
- Once the Device Library loads, (2) locate the "Location View" icon and click on it.
The Device Library
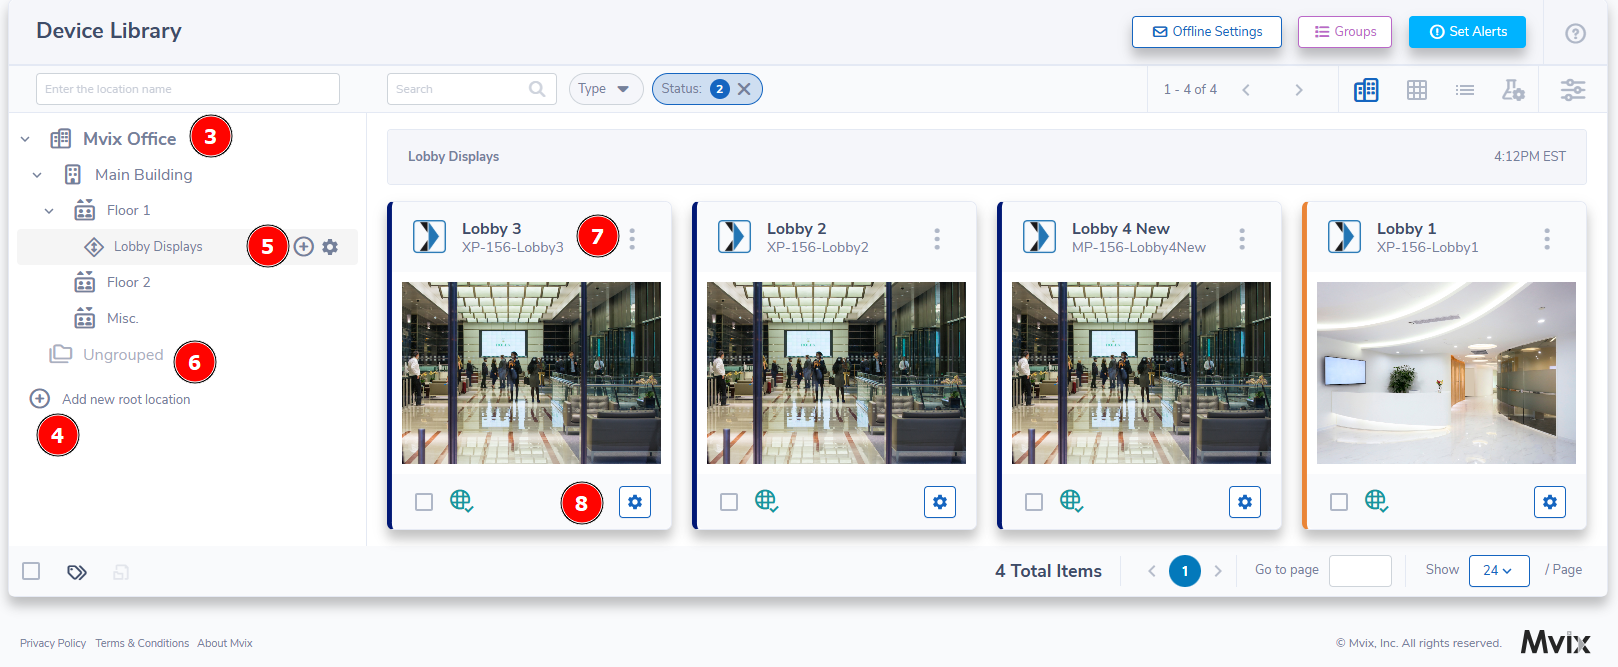
- The device library is split into two main sections. On the left, you'll see a (3) location tree where you can set up specific groups and nest them under larger groups. On the right, you'll see all the players that are nested under the chosen location.
- When you first load the location view on an account, all devices will be under the (6) "Ungrouped" category. Before you sort them though, you'll need to build your locations out.
- You can either edit from the default root or (4) click the bottom choice to add a new root location.
- The above example shows a standard layout where you have the main root be the headquarters. From there we built so each building had separate floors, then grouped them further by use case.
- To add (5) sub-locations, hover over where you want to add it and click the plus button. The gear icon gives you advanced options for naming the location, changing the time-zone, adding a description, and changing the icon/color.
- Once your locations are set up, click the ungrouped folder. Then, click and hold the device on the right, then drag it into the desired location.
- You can also view more (7) device information or click on the (8) gear icon at the bottom of the device if you need to edit, reboot, or see other device controls.
Scheduling Based On Groups

- If you want to publish based on location, complete the process up until you reach "Select Locations". (9) Click the drop-down and select "Locations".
- Your locations should now show. You can see the sub-locations by (10) clicking the arrow on the left side. Then, click the (11) toggle on the right to choose all devices under that location.
- Important Note: Choosing a location will auto-select all sub-locations.