How to Automatically Update Your Mvix Digital Signage Player
When a new software update is available for your Mvix Digital Signage Player, you can configure your account to apply it automatically, no manual intervention required. Setting up an Automatic Update Window ensures your devices stay current with the latest bug fixes, security patches, and features, all while running updates during a time that works best for your business.
What You'll Need
- An Mvix Digital Signage Player
- An Active Mvix CMS Account
- Internet Connectivity For Your Device
- Admin-Level Access On Your Dashboard
First Steps
- Log into your Mvix Dashboard. This can be accessed at cms.mvix.com.
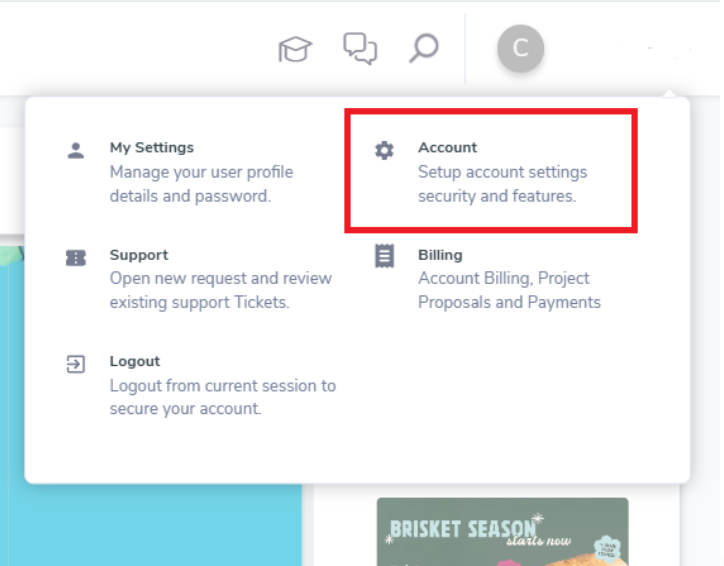
- Hover over your name at the top-right corner of the dashboard. A drop-down list of items will appear. Select Account.
- Once your account page loads, scroll down until you find the Device Software Update section.
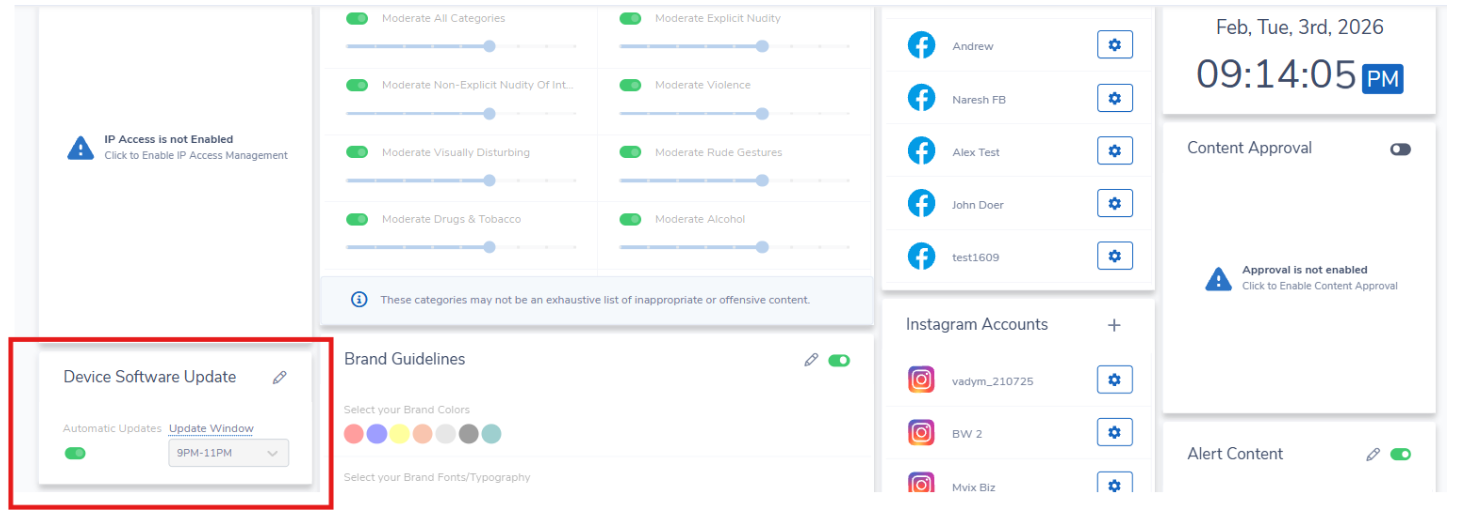
- Click on the pencil icon at the top-right of the module to enable edit mode.
- Then, make sure to toggle the Automatic Updates to on (green).
- Lastly, click the "Update Window" drop-down and select when you would like the updates applied to your devices.
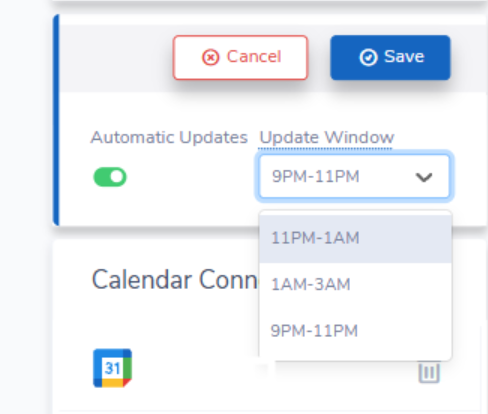
- Cllick save when you are satisfied with the setup to finalize automatic updates.