
How Do I Use The Video Input Feature?
Video Input is a popular feature that is available on the Mvix CMS that allows users to display a live video input into a specific zone. This feature is most useful to clients whose audience is sitting for an extended period of time; such as in bars, waiting rooms, or lobbies.
What You'll Need
- A compatible digital signage player such as the BrightSign XT1144.
- Mvix CMS with a supported feature package.
- Connection to an external video source
Setup
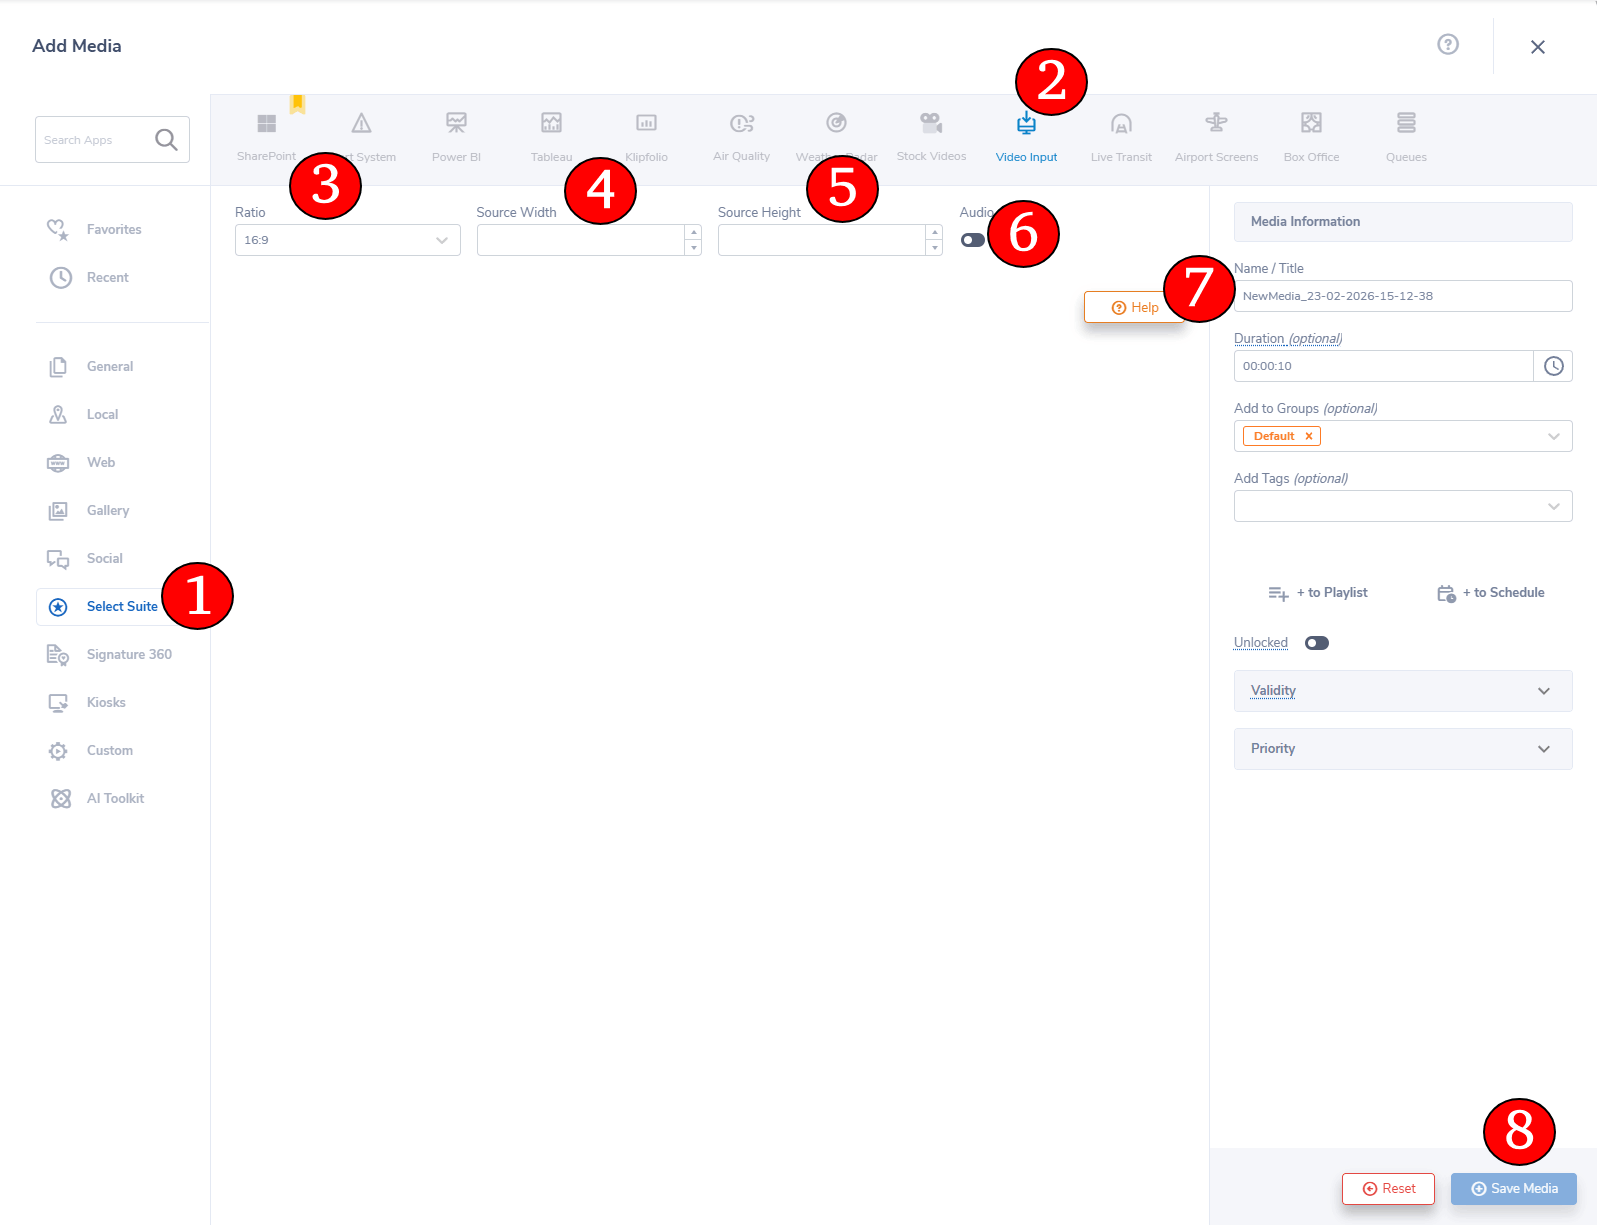
- From the "Add Media" module, you can find the Video Input app by clicking on the (1) Licensed category and clicking again on the (2) Video Input app.
- This will open up the above module. Here, you'll see four available options for setting up your video input:
- (3) Ratio - This is the width by height ratio. 16:9 is the default and most likely the one you will use
- (4) Source Width & (5) Source Height - This will Match the pixel dimensions of the source video feed (ex. 1920×1080, 1280×720, 640×480, etc.)
- (6) Audio - Enables/disables audio capture along with the video input source
- Once you have confirmed your settings, be sure to (7) name your media then (8) click "Save Media" to add it to your library.